
Photographing in winter is one of the most challenging things to do in landscape photography. Not only are the conditions difficult (freezing, snowing or foggy) but also cameras don’t always work well under these circumstances (underexposing photos, problems with AF, batteries drain faster). Photographing winter in the mountains is even more challenging because trekking becomes more tiring and also it might be risky at times. Despite difficulties, winter landscape photography is really rewarding – you can get some beautiful light and mood for free as light is generally warmer and reflects from snow and ice.
In this article I will try to share some tips on taking HDR and landscape photos in mountains & winter scenery. I also share some photos to give you an even better idea:
- Safety
I start with safety because I consider it the most important aspect of photographing winter in the mountains. Not only might the slopes be slippery which increases chances of falling (and breaking your leg or camera) but there might be a high risk of avalanches too. During my recent stay in the mountains, the risk of avalanches was 3 in 5 step scale what means Considerable (statistics say that very many avalanches occur even at 2/5 in Polish mountains!). For that reason I preferred staying in the valleys. Remember – there is no photo worth risking your life or health. If you’re ever in the position where you risk your life for photography think how many good photos you will loose if you die. And by the way the valleys are still very beautiful.
- Protect your gear
Most cameras don’t like moisture at all. In the mountains there is plenty of it – falling snow or rain, fog, waterfalls are all sources of it. You can cover you camera and lenses with a plastic bag or hood specifically designed for this purpose. If you don’t have either of them make sure to have at least a dry cloth with you and clean your equipment from time to time. Although some lenses are water- and weatherproof (e.g. Canon L-series lenses) you still need a filter to make this “protection” really work. UV filters will do most of the time. One last thing to remember is that going from cold winter scenery into a warm room might result in fog condensation inside the lens (one of the last things you would like to happen to your gear). So if possible don’t treat your gear with shock therapy and put it near the open window for a while and then close. The idea is to warm up the gear slowly. Step by step. - Travel light
Trekking in the mountains is tiring even in spring or summer. With deep snow (and sometimes ice) all over the track it gets even more difficult. And most of the interesting locations aren’t accessible by any vehicle (sorry guys ). So it is essential to take only necessary equipment with you. Normally, when shooting in the urban areas, I have 2 cameras, a tripod and 1 or 2 additional lenses with me (plus a lot of cables, filters, a flash etc.). In the mountains I travel with only 1 camera (and sometimes an additional lens) + tripod + a few favorite filters + spare batteries. This makes it possible to trek 15 – 25 km without being completely exhausted. Tea in the vacuum flask might also be a good idea.
- Make sure you have additional batteries
Batteries run out much quicker when it’s cold. Having additional power source is therefore essential to take all shots you want. With long walks I started around morning golden hour and ended at evening golden hour. I was taking plenty of shots (up to 1000 per day, including some longer exposures) so many batteries were essential. And additional batteries will be even more important if you’re planning to shoot some night HDR shots. Not only is it cold but the exposures might be as long as 120 seconds or even longer. - Take a circular polarizing filter with you.
Always. On a clear day it will help you make the sky more blue (and the trees more green). Besides, mountains are full of waterfalls and small streams. CPL filter will help you reduce unwanted reflections in them (and on the nearby rocks). BTW on the subject of waterfalls – be prepared that some of the smaller ones might be frozen in winter. - Use your best lenses in terms of chromatic aberration levels.
Snow scenes are often very contrasty which makes it great for increasing colour fringing. Generally speaking primes perform better in this regard than zoom lenses so if you have some – make sure to use them.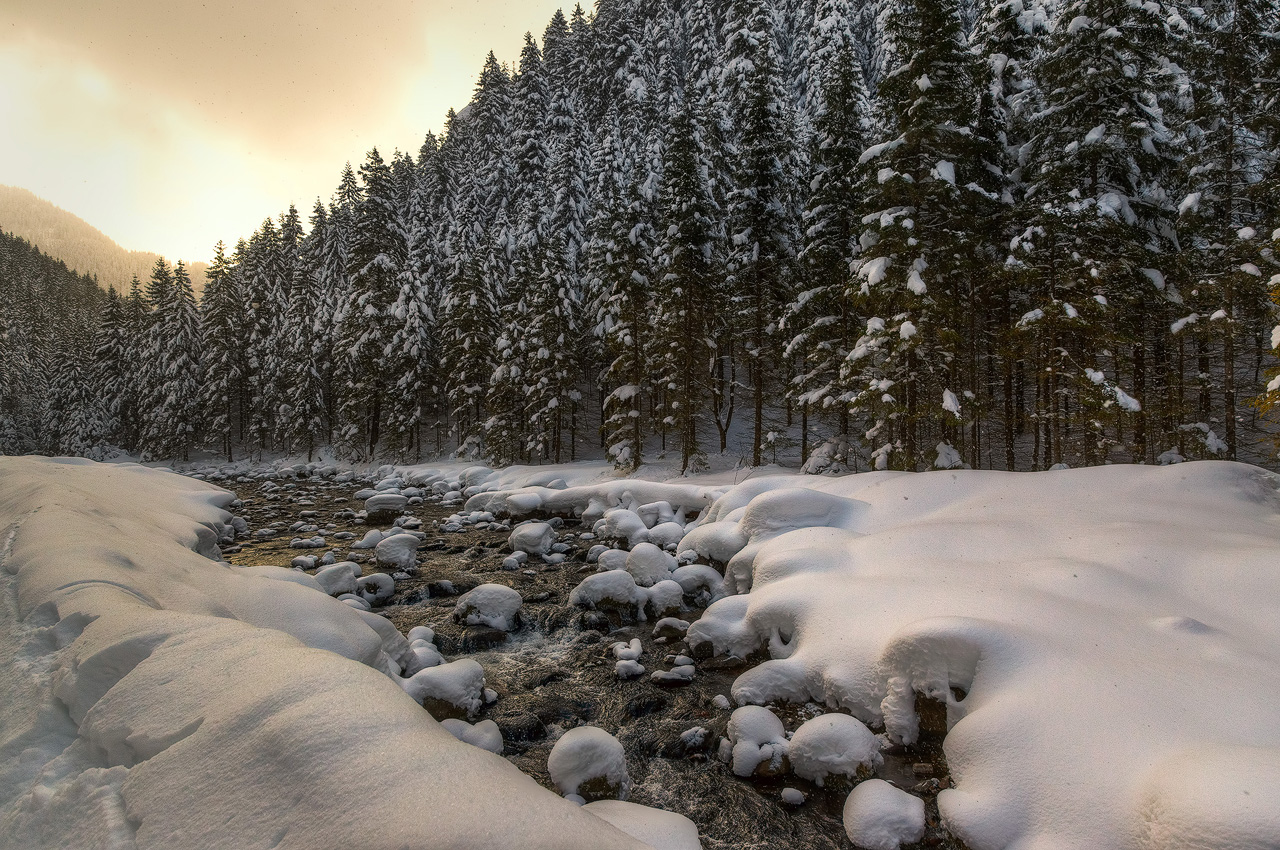
- Try shooting in vertical orientation
Although I take most of my landscape photos in landscape orientation, in the mountains I often prefer vertical orientation. The reason for this is that all tall subjects (like tall pines or mountains) look better in this orientation. More majestic. - Focus on details.
Although mountains look amazing in a wide angle try to zooming in and focusing on smaller part – be it part of the peak, a stone in the stream or lake. When I talk about details I would like to suggest trying to find interesting textures and small details (moss, texture of the rocks) as they look very interesting after tone-mapping. - Get up early in the morning
If you’re lucky and it’s sunny you might be able to capture some amazing fog. If you find a high vantage point it will get even better because you will be able to capture the valley covered with clouds or fog. Such scenes might have very wide dynamic range (especially if there is sun in the sky) but hey – we’re shooting HDR, aren’t we? Another tip: make sure you use Cloudy or Shade white balance setting to give this nice warm feel to your sunrise photos. Similarly, blue hour might be pretty amazing in the mountains as there is also a great chance of fog around evening.
- Shoot more brackets
In most cases 3 photos at 2 EV spacing won’t be enough – the reason for that is that many scenes will have much wider dynamic range than “regular” scenes. You might need up to 5 photos at 2 EV spacing (or 9 at 1 EV) to cover whole dynamic range of the scene where there is snow. The worst case is when you have both snow, sky with sun and clouds and forest in the frame. Sun and snow are both very bright. Forests are very dark. The other difficult case is a stream (dark water), with rocks in it covered with bright moss and all that surrounded with bright white snow. Bear in mind that it’s easy to go over the top with HDR processing winter scenery. The thing is our own eyes don’t capture whole dynamic range of the winter scene. Look at the sun and forest on the mountains hills. It will look as black (even though the trees are green). - Make sure snow is white in your photos by:
- Setting custom white balance (Auto doesn’t work well in the majority of cases) – note that snow isn’t the best source to set white balance because it isn’t really white and what’s more it’s reflecting surrounding environment (in a different way than water does but still).
- In Photomatix Pro (or any other HDR app) you will notice that snow becomes grey. To prevent it in Photomatix you can: increase Smooth Highlights (even up to maximum value of 100), White Point (above default 0.25% value) and play with Lighting Adjustments and Luminosity settings.
- Try Exposure Fusion instead of tone-mapping
With winter scenes it might be easier to get realistic results with Tone Compressor or Fusion/Natural processing methods than with Details Enhancer. One of the reasons is that with both methods the snow won’t turn grey. The other is that snow doesn’t really need a lot of local contrast adjustments.


