Powered by Blogger.
Monday, November 26, 2012

Kitesurfer and my article on HDR One

I really like shooting action shots from time to time. When I was on Fuerteventura I also had a chance to do this with so many water sports enthusiasts all over the place. Here is one of such photos. I used shutter speed of 1/800 s to freeze motion but now I can see that using even faster shutter speed would be a great idea.

I would also like to share the link to my article on HDR One page: Understanding HDR. It details what HDR and tone-mapping really are. Hope you will learn something interesting from it.

EXIF data:
Camera: Canon 50D
Lens: Canon 70-300 f/4-5.6 L IS USM
Focal length: 300 mm
Aperture: f/6.3
Exposure time: 1/800 s
ISO: 200
Number of exposures: 1
E.V. Step: n/a
Flash used: no
Tripod used: no
Filters used: no
Software: Lightroom 4.1, Photoshop CS5
Sunday, November 25, 2012

Reflection in pavement

One of the things I didn't expect to see on Fuerteventura was rain. And although most of the time I had beautiful weather with sun shining there was one day when it was raining pretty heavily. The worst thing was that on that very day I decided to go to La Oliva town to see a few interesting things there (like church with some of its parts built of volcanic rock and colonels' house). The good thing was that once it stopped raining there were some nice reflections :)

EXIF data:
Camera: Canon 50D
Lens: Canon 10-22 f/3.5-4.5 USM
Focal length: 16 mm
Aperture: f/10.0
Exposure time: 1/50 ("middle" exposure)
ISO: 100
Number of exposures: 3
E.V. Step: 2 E.V.
Flash used: no
Tripod used: no
Filters used: no
Software: Magic Lantern 2.3, Photomatix Pro 4.2.4, Lightroom 4.1, Photoshop CS5
Saturday, November 24, 2012

Graphics programming vs photography

One of my few hobbies apart from photography is computer graphics programming. In the past I worked as a video game programmer and was also developing a number of indie and amateur game projects. One of the things I was (and well sort of still am) interested in was 3D graphics programming. It's pretty fascinating trying to recreate reality, use approximations to create something as similar as possible to what we see in reality. I implemented environmental effects such as clouds, water, grass, sky, etc. Although it might all sound simple in fact each of the things was pretty difficult to do for a few reasons. First of all existing mathematical models are often too complex for current generation of PCs. Another is that not all models produce really realistic results. But the biggest issue is that 3D graphics ages pretty fast. What looks realistic one year, looks old-school just a few years later (take any game 10 or more years old - probably you will be shocked how bad it looks). So you have to still improve graphics code. Tedious work :)

Why I'm writing about all this? Well, I just realized that with photography it's so much easier. Of course in the past, equipment wasn't that excellent. Some old photos might be a little blurry, lack contrast or colour saturation but if the composition or subject of the photos is great, it still is a great photo. With digital cameras it's even easier because contrary to the film, the RAW files (or TIFFs or JPGs) doesn't change with time.

Just a thought :)

EXIF data:
Camera: Canon 5D MK II
Lens: Canon 24-105 f/4 L IS USM
Focal length: 24 mm
Aperture: f/9.0
Exposure time: 1/160 ("middle" exposure)
ISO: 400
Number of exposures: 3
E.V. Step: 2 E.V.
Flash used: no
Tripod used: no
Filters used: circular polarizing filter
Software: Photomatix Pro 4.2.4, Lightroom 4.1, Photoshop CS5
Friday, November 23, 2012

Desert near El Cotillo

Here is a HDR photo I took near El Cotillo town on Fuerteventura. Not many colours but for some reason this is kind of landscape that I really really like.

EXIF data:
Camera: Canon 5D MK II
Lens: Canon 24-105 f/4 L IS USM
Focal length: 24 mm
Aperture: f/7.1
Exposure time: 1/250 s ("middle" exposure)
ISO: 200
Number of exposures: 3
E.V. Step: 2 E.V.
Flash used: no
Tripod used: no
Filters used: no
Software: Magic Lantern, Photomatix Pro 4.2.4, Lightroom 4.1, Photoshop CS5
Thursday, November 22, 2012

Tutorial: how to use Magic Lantern for taking bracketed photos

As for my other recent HDR photos I used Magic Lantern 2.3 for this one.
I mentioned the fact that I use Magic Lantern firmware modification several times already. One of the most useful features for me are extended auto-bracketing capabilities. Both my Canons (50D and 5D MK II) can normally take only 3 exposures in auto-bracketing mode spaced at up to 2 EV. This is often not sufficient co cover whole dynamic range of a scene. For that reason most of the time I shoot 5 exposures or more. Before using Magic Lantern what I did was to change the exposures manually in camera. The problem with that approach was that touching the camera introduced the chance of moving it slightly what could result in misaligned results. Moreover, it took much longer (as it was: adjust settings, press shutter, adjust settings... process) so it was basically good only for fairly static scenes as otherwise a lot of ghosting occurred.

But with Magic Lantern things are so much easier. I can simply set number of photos I want and the spacing between them and I'm done. Here are the steps:
Magic Lantern main menu
  1. Change your exposure mode to Manual.
  2. Open Magic Lantern menu and head over to the Shoot submenu using dial (it's 4 icon from the left in the image above).
  3. At the top of this submenu you will notice HDR Bracketing option. It's off by default. To toggle it, just press SET button.
  4. It will now use your previous settings. If you haven't set ones, or would like to change them press the FUNC button over it - it will open HDR Bracketing preferences.
  5. From there you can adjust all the settings, with following being most useful (take a look at the image below for reference):
    1. Frames - number of exposures you would like to take. By default you can take any number from 2 - 9. There is even an Autodetect option which evaluates the scene and takes required number of shots. No need to guess!
    2. EV increment - EV spacing, values from 0 EV to 5 EV are possible. However, it's good to keep it in the range 1 EV - 2 EV. If you choose anything larger than that you will have not smooth color gradations as described here. If you choose value smaller than 1 EV you will need much more photos to cover the same dynamic range and also the benefit in terms of quality might be impossible to notice.
    3. Sequence - you can also adjust sequence in which photos are taken. In this case the choice is fairly limited and I usually keep it at default.
What's more if you need further info on any of the settings just press INFO button on your Canon - quite a lot of useful information will be displayed.

When you want to take a photo just press shutter release button and all the magic will happen :)
Wednesday, November 21, 2012

Jetty in infrared

Today I decided to upload photo from Masuria. Infrared photo from Masuria to be exact. Sorry for not writing more but I'm really busy in the recent days.

EXIF data:
Camera: Canon 50D
Lens: Canon 10-22 f/3.5-4.5 USM
Focal length: 10
Aperture: f/9.0
Exposure time: 30 s
ISO: 640
Number of exposures: 1
E.V. Step: n/a
Flash used: no
Tripod: yes
Filters: Hoya IR R72
Software: Lightroom 4.1, Photoshop CS5
Tuesday, November 20, 2012

Hut by the lake

Today a photo from Masuria (there are still more than 5000 photos from Fuerteventura waiting to be processed but I don't have time recently) taken in summer last year. I really like the warm summer light here.

EXIF data:
Camera: Canon 50D
Lens: Canon 24-105 f/4 L IS USM
Focal length: 47 mm
Aperture: f/9.1
Exposure time: 1/64 s
ISO: 100
Number of exposures: 5
E.V. Step: 2 EV
Flash used: no
Tripod used: yes
Filters used: no
Software: Magic Lantern, Photomatix Pro 4.2, Lightroom 4.1, Photoshop CS5
Monday, November 19, 2012

Tip: using HDR doesn't mean you can't use filters

Many photographers doing HDR photography don't use any filters on their lenses (apart maybe from UV filter used as a protection). However, it's a big mistake in my opinion. Why? As I said before, HDR is about light and detail not colour. So basically whatever you can do to enhance colour is good. When shooting landscapes I almost always have circular polarizing filter with me. It helps me in making the colours more saturated and rich and also removes unwanted reflections - not only from water but from objects in the scene. You might consider warming or cooling filters if you like them (I'm not great fan of them I must admit).

Moreover, despite the fact the HDR is about light it doesn't mean that you can't influence exposure to slow down time. HDR just makes sure everything is properly exposed: from the darkest shadows to the brightest highlights - it doesn't care whether shutter speed is fast or slow. Feel free to use neutral (and colour) density filters to create smooth water or even use gradual density filter - the last one might sound weird but I found out that using it with HDR creates slightly different and more dramatic mood. What you can even do is using Infrared filter for HDR photography. Note however that you might end up with very long exposures with the last one.

What I'm trying to say here is that HDR isn't something special and you should treat it differently. Do you use filters normally? Then use them with HDR as well. You don't use them? Then give them a try because often the results are superior to what is possible to achieve in Photoshop :)

Ok, a few words about a photo from this blog post now. I took it near El Cotillo. Although the town didn't impress me as you could have read on my profiles on Facebook or Google+, the surroundings are stunning, from beautiful beaches, cliffs, to a wonderful desert with some mountains in the back. And yes, I did use circular polarizing filter here. Otherwise, even with HDR, the colours would be slightly different.

EXIF data:
Camera: Canon 5D MK II
Lens: Canon 24-105 f/4 L IS USM
Focal length: 28 mm
Aperture: f/7.1
Exposure time: 1/500 s ("middle" exposure)
ISO: 400
Number of exposures: 3
E.V. Step: 2 E.V.
Flash used: no
Tripod used: no
Filters used: circular polarizing filter
Software: Magic Lantern, Photomatix Pro 4.2.4, Lightroom 4.1, Photoshop CS5

Sunday, November 18, 2012

Desert or beach?

Corralejo beach on Fuerteventura island is not a desert strictly speaking (it's beach as the name implies). However, as it is just about 100 km away from the shores of Africa it was possible for the wind to "pick" some of the sand from Sahara desert and drop it on Fuerteventura. As the winds are generally the same as on Sahara desert, Corralejo beach really reminds a desert with its beautiful sand and high dunes. It is why it is now a national park.

EXIF data:
Camera: Canon 5D MK II
Lens: Canon 24-105 f/4 L IS USM
Focal length: 55 mm
Aperture: f/8.0
Exposure time: 1/200 s ("middle" exposure)
ISO: 100
Number of exposures: 7
E.V. Step: 1.5 E.V.
Flash used: no
Tripod used: yes
Filters used: no
Software: Magic Lantern, Photomatix Pro 4.2.4, Lightroom 4.1, Photoshop CS5
Saturday, November 17, 2012

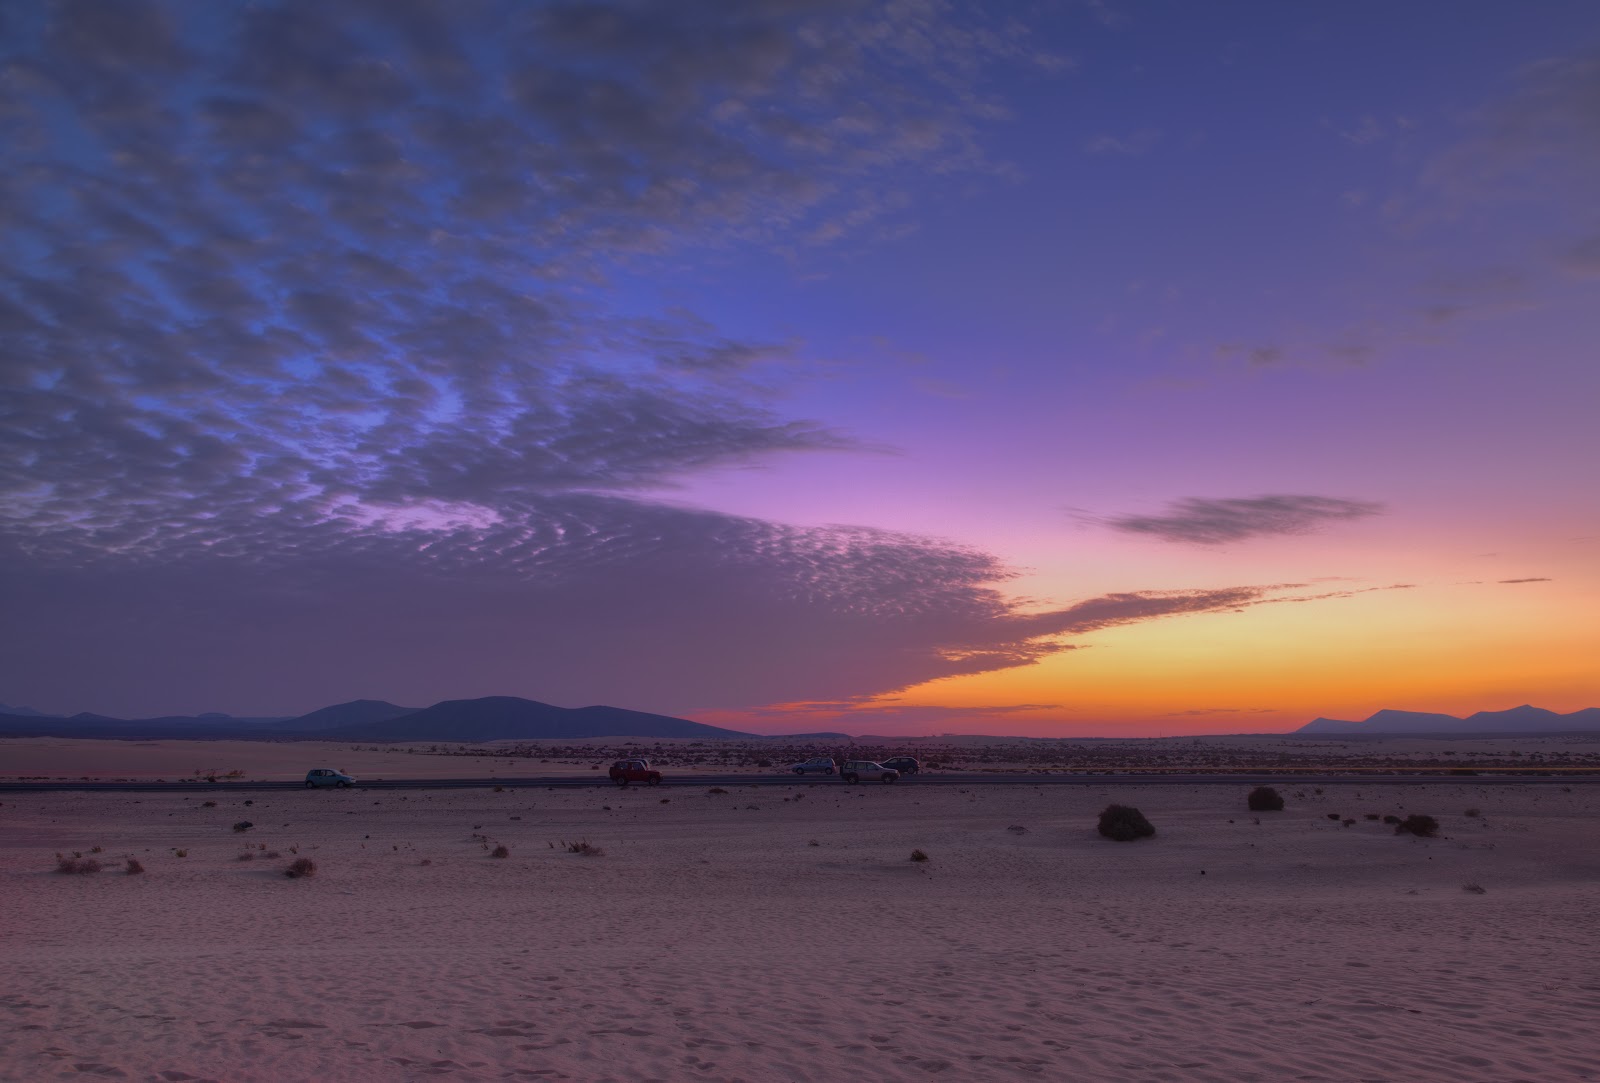
Sunset over desert

Here is another sunset photo from Fuerteventura island. To be precise I took it a few minutes after sunset. The sky had some beautiful colours ranging from reds and oranges just above horizon through purples to blues high in the sky. Unfortunately the clouds didn't want to cooperate and their colour is quite boring compared to the sky... but still quite a nice image.

EXIF data:
Camera: Canon 5D MK II
Lens: Canon 24-105 f/4 L IS USM
Focal length: 32 mm
Aperture: f/8.0
Exposure time: 1.3 s ("middle" exposure)
ISO: 100
Number of exposures: 5
E.V. Step: 1.5 E.V.
Flash used: no
Tripod used: yes
Filters used: no
Software: Magic Lantern, Photomatix Pro 4.2.4, Lightroom 4.1, Photoshop CS5
Friday, November 16, 2012

One more night shot

Ok, one more astrophoto. From tomorrow I should be back to uploading some HDR stuff and some tutorials as well. In this shot I used slightly different exposure settings to the rest of my recent astrophotos. Instead of ISO 800 + 10 s combination I used ISO 100 + 30 s combo. This resulted in a slightly lower noise (although there is some due to long exposure of course). I'm really happy with the composition and colours.

If you're interested in how I achieved such an effect read my tutorial about taking photos of the starry skies (part 3 should be ready next week). There are much more tutorials in the Tutorials section of this blog.

EXIF data:
Camera: Canon 5D MK II
Lens: Canon 24 f/1.4 L USM II
Focal length: 24 mm
Aperture: f/1.4
Exposure time: 30 s
ISO: 100
Number of exposures: 1
E.V. Step: n/a
Flash used: no
Tripod used: yes
Filters used: no
Software: Lightroom 4.1, Photoshop CS5
Thursday, November 15, 2012

Traces of aliens?


Ok, one more astrophoto. There are a few more left on my disk so I hope you won't get bored with them. Some HDRs will be uploaded soon so stay tuned.

In this case I used focus stacking to create bigger depth of field. For details you can read my tutorial about this (or other tutorials in the Tutorials section). Otherwise with aperture of f/1.4 I would have either foreground or background completely blurry. I still regret not taking more photos (I took 3 as far as I remember) because the hut could be a little sharper.

EXIF data:
Camera: Canon 5D MK II
Lens: Canon 24 f/1.4 L USM II
Focal length: 24 mm
Aperture: f/1.4
Exposure time: 10 s
ISO: 800
Number of exposures: 1
E.V. Step: n/a
Flash used: no
Tripod used: yes
Filters used: no
Software: Lightroom 4.1, Photoshop CS5
 
© Copyright 2011 Photoshop and Photography All Rights Reserved.
Free Templates by Cool Blogger Tutorials- Powered by Blogger.com.