
Time for another before/after comparison + some post processing details. This time a sunset photographed in Warsaw. What I focused on in this shot was that beautiful huge cloud behind the Royal Palace. I wanted it to be the hero of this shot and to make the exposure of the final image match the exposure of that cloud. For that reason I decided to go with low light processing. If I made the city brighter it would look slightly unnatural and also viewer would pay more attention to it than the cloud itself.
I took 5 exposures at 1 EV apart but ended up manually blending only 4 of them. I dropped the brightest one because it was too bright for my needs.
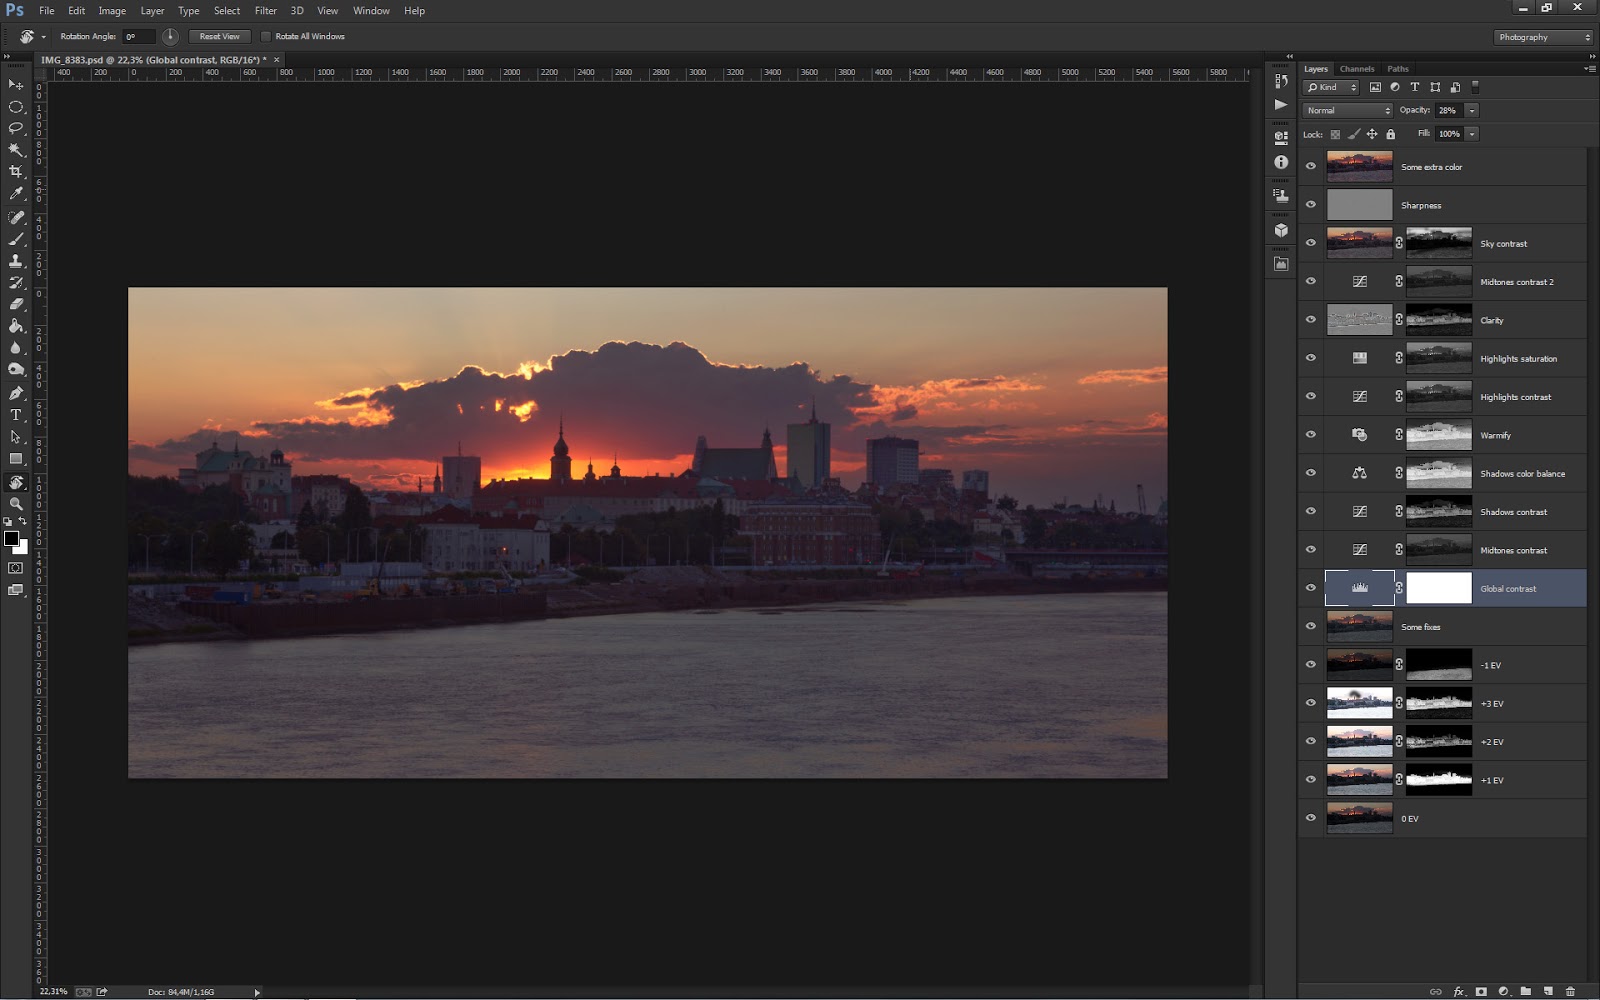
In the image below you can see what layers I used to create final image. Starting from bottom they are:
- 0 EV - base image. I took from it sky and water.
- +1 EV, +2 EV, +3 EV - images that correspond to +1 EV, +2 EV and +3 EV photos from my bracketed sequence. I used them to brighten up city itself.
- -1 EV - photo I used to darken water a little bit to match general brightness of the image.
- Then I applied some global fixes to the image.
- Global contrast - I then increased global contrast using Levels adjustment layer by decreasing gamma to 0.82 and moving White Point to 164.
- Midtones contrast - then I slightly increased midtones contrast using Curves adjustment layer.
- Shadows contrast - applied some contrast to the city buildings.
- Shadows color balance - I fixed colour balance of shadows portions of the image by moving it towards Red and Magenta.
- Warmify - I applied warm photo filter to the shadows.
- Highlights contrast - I increased contrast of brightest parts of the image using Curves adjustment layer.
- Highlights saturation - I increased saturation of Reds and Yellows in the sky.
- Clarity - increased shadows clarity by applying High Pass filter with large radius to them as described in this tutorial.
- Midtones contrast 2 - added a bit more of midtones contrast.
- Sky contrast - added a bit of contrast to the cloud and sky using Overlay blending mode.
- Sharpness - added some sharpening.
- Some extra color - increased saturation using Topaz Adjust filter.
Technical details:
Camera: Canon 5D MK III
Lens: Canon 24-105 f/4 L IS USM
Focal length: 105 mm
Aperture: f/22.0
Exposure time: 8 s ("middle" exposure)
ISO: 50
Number of exposures: 5
E.V. Step: 1
Flash used: no
Tripod: yes
Filters: neutral density filter
Software: Magic Lantern 2.3, Lightroom 5.0, Photoshop CC


