

It's time for yet another before/after comparison + some post processing details (for more comparisons like this one go here), where I share my post-processing workflow. This time the very beautiful Hala Gąsienicowa in Polish Tatra Mountains. In this case the light was quite weird if I may put it this way. In foreground the light was very bright and warm but background was hidden in the shadow cast by the clouds making it look dark and sad.
This time I took only 3 exposures at 2 EV spacing, merged them to HDR and tone-mapped in Photomatix Pro using Details Enhancer at the very soft settings because I wanted tone-mapped image to look very close to 0 EV photo (which is Before). In this case I used HDR and tone-mapping mainly to restore details in the clouds. Then I edited my image with luminosity masks technique in Photoshop CC (After).
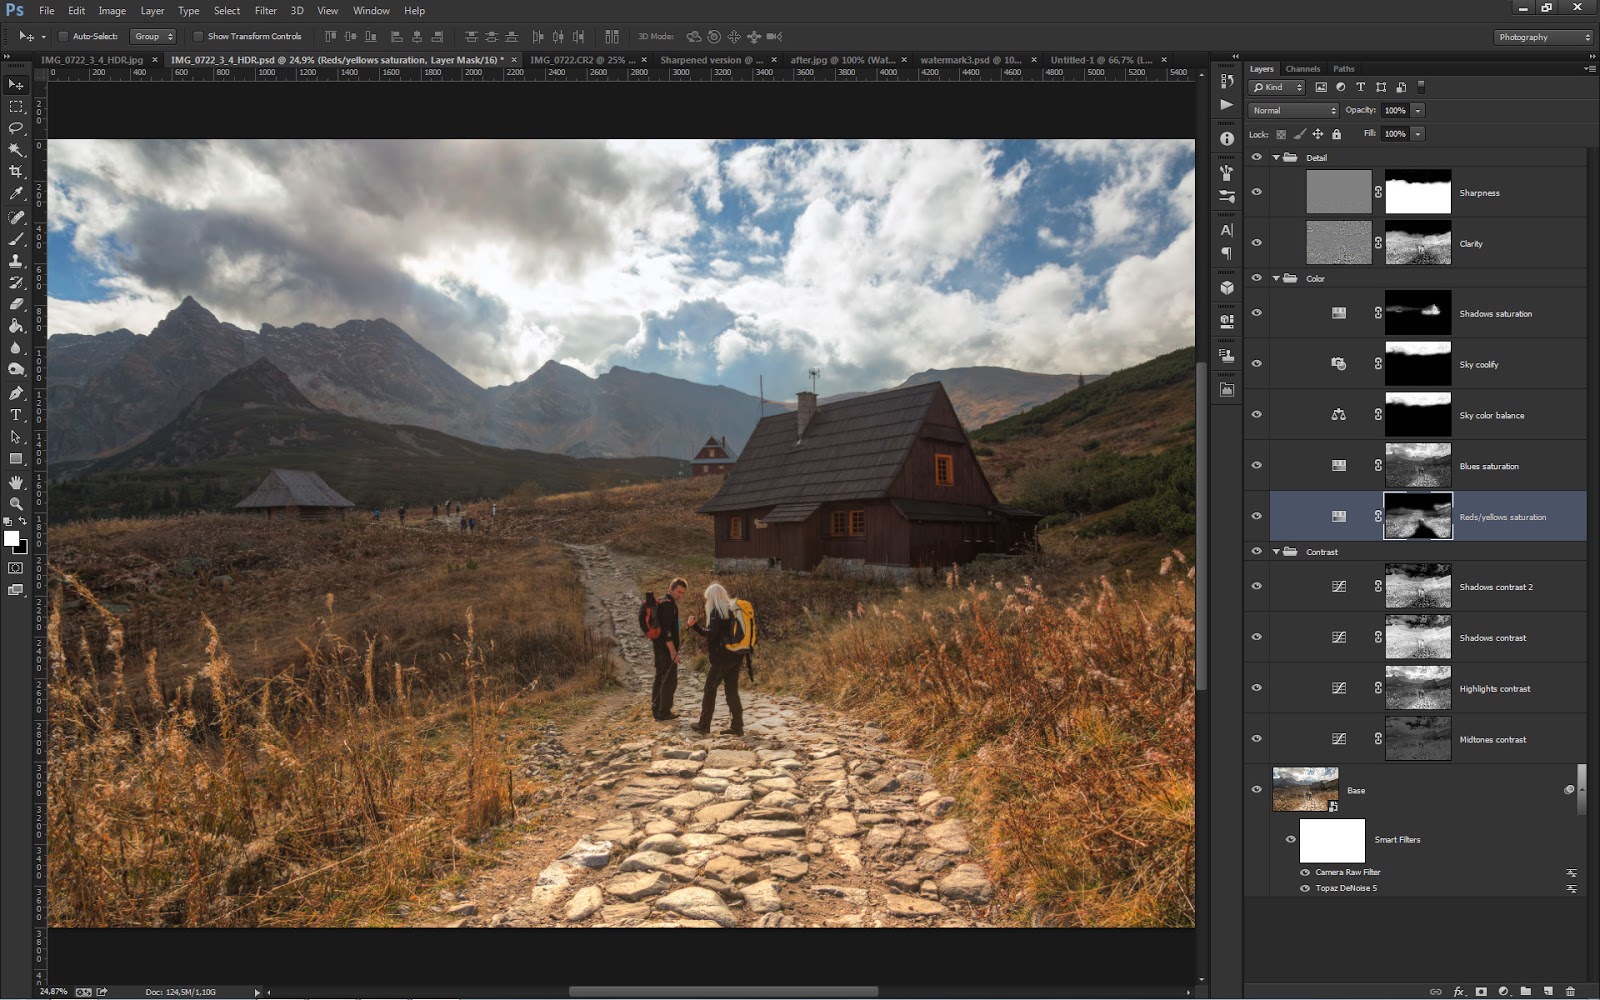
In the image below you can see what layers I used to create final image. Starting from bottom they are:
- Base - image produced by Photomatix Pro's Details Enhancer - to learn how to create HDR images and how to tone-map them read my free HDR tutorial.
- As you can see there are some smart filters attached to this layer. Using smart filters is another non-destructive way of editing your photos and they are pretty powerful. I will describe them in depth soon.
- Camera Raw Filter - I applied some basic adjustments to the exposure of the photo, restored some highlights and increased general vibrance.
- Topaz Denoise 5 - I also applied some weak denoising using Topaz Denoise plugin
- Midtones contrast - I increased contrast of midtones a little bit to add some contrast pop.
- Highlights contrast - I decreased brightness of highlights (mainly in the path and the clouds areas) and increased contrast there using Curve adjustments layer.
- Shadows contrast - I added some contrast to the darkest parts of the image (mountains, grass, house) and slightly brightened them up. I used Curves adjustments layers for this purpose.
- Shadows contrast 2 - I added even more shadows contrast but this time I simply used Soft Light blending mode (which has the effect of increasing contrast).
- Reds/yellows saturation - I increased saturation of reds and yellows (grasses, house).
- Blues saturation - I decreased saturation of blues (mainly in the sky and mountains) to remove unwanted blue cast and make the sky look more natural.
- Sky color balance - made the sky color a bit cooler (as originally it had very warm tones) using Color Balance adjustments layer.
- Sky coolify - made the sky even cooler using Photo filter adjustments layer.
- Shadows saturation - slightly increased saturation of darkest shadows (house in front and mountains)
- Clarity - increased clarity of the image using this technique.
- Sharpness - added some sharpening using high-pass sharpening technique.
Finally some EXIF and other technical specs:
Technical details:
Camera: Canon 5D MK III
Lens: Canon 24-105 f/4 L IS USM
Focal length: 24 mm
Aperture: f/8.0
Exposure time: 1/400 s ("middle" exposure)
ISO: 640
Number of exposures: 3
E.V. Step: 2
Flash used: no
Tripod: no
Filters: circular polarizing filter
Technique: HDR, tone-mapping, luminosity masks
Software: Magic Lantern 2.3, Photomatix Pro 5.0 beta (Details Enhancer), Lightroom 5.0, Photoshop CC


