Powered by Blogger.
Wednesday, March 27, 2013

Thoughts: Learn your gear

You might have the best equipment under the sky and still take poor quality photos. Or you might have pretty decent photo gear and take photos like a pro. How it's possible? One of the key factors to take good photos, although one that many photographers doesn't mention at all, is knowing your gear. No lens or camera body is perfect under all conditions. Each of them has its strengths and weaknesses. In case of cameras it can be great dynamic range and low noise in low-light situations (on the pros side) but slow or inaccurate auto-focus mechanism (cons). Lens might produce great bokeh but might also have problems with chromatic aberration or flares.

Believe me, no equipment is ideal and getting to know that takes some time.

What I often do to learn my gear is to limit number of extra gear (mainly lenses) I'm taking with me. Although I own quite a few lenses and this collection seems to grow over time, I hardly ever have more than 2 with me. This way I limit my choices. I don't have to waste time wondering whether I should take a photo with prime or zoom or maybe telezoom. I just take it. I also try to change my setup from time to time. What I mean that one time I will take a wide-angle zoom lens + telezoom lens but the other time I will take wide-angle prime + standard zoom lens. What I try to avoid is to take 2 lenses with same or similar focal range. Instead I try to take lenses that would allow me to cover wider focal range.

When I'm back at home and download my photos I can clearly see issues and strengths in each of the lenses. Of course I don't inspect photos at 100%, trying to calculate lens' resolution for instance. No, there are many great tests which do it in a much more reliable way than I could do at home. However, looking with some care I can quickly see if there is strong colour fringing (chromatic aberration), vignetting or too strong distortion.

After some time you will know your gear perfectly. For instance now I know that for any night/sunrise/sunset landscape photos 24 f/1.4 II lens is a perfect choice. Low chromatic aberration and low flares help significantly during sunrises when I have sun in the frame. However, my general travel lens is Canon 24-105 f/4 L. Although it has some problems with chromatic aberration and isn't that sharp it's a great general purpose lens offering very universal range of focal ranges. Similarly if I'm to shoot some action I will probably use Canon 50D. Its fast burst (6 fps) mode is a great help. In addition the fact that it's a crop body it will make each lens longer (eg. 100 mm on a crop body becomes 160 mm) what is also very useful for action shots. However, for any serious landscape photo shoot or any night photos I'm taking 5D MK II because it offers lower noise and in general better image quality.
Tuesday, March 26, 2013

Soft winter light

I took this photo during late afternoon in Zakopane. The scenery was beautiful, light was very soft, the snow was falling. Winter wonderland :)

EXIF data:
Camera: Canon 5D MK II
Lens: Canon 24-105 f/4 L IS USM
Focal length: 24 mm
Aperture: f/7.1
Exposure time: 1/500 s ("middle" exposure)
ISO: 200
Number of exposures: 5
E.V. Step: 1
Flash used: no
Tripod: no
Filters: no
Software: Magic Lantern 2.3, Photomatix Pro 4.2.5 (Details Enhancer), Lightroom 4.2, Photoshop CS6
Monday, March 25, 2013

Black & white HDR from Tatra mountains

This photo was rather boring in colour because the light was very flat. However, after conversion to B&W I somewhat like it. It looks like an old image.

EXIF data:
Camera: Canon 5D MK II
Lens: Canon 24-105 f/4 L IS USM
Focal length: 24 mm
Aperture: f/7.1
Exposure time: 1/60 s ("middle" exposure)
ISO: 400
Number of exposures: 3
E.V. Step: 2
Flash used: no
Tripod: no
Filters: no
Software: Magic Lantern 2.3, Lightroom 4.2, Photoshop CS6
Sunday, March 24, 2013

Blogging for 2 years!

Yes, that's true. I'm blogging here for exactly 2 years! I wrote my very first post on 24.03.2011 and it was just kind of "Hello World" post. However, for the first year I was writing very rarely, just every few weeks or even months. This changed during last year when I started to write new posts much more regularly (daily most of the time). This resulted in drastic increase in number of visits. From just a few (let's say 10 - 15) per day to more than 200 per day. It's still far from my goal but I'm working on it :)

However, this blog isn't my first one. My other one (which was a bit more popular) was about game and 3D graphics programming. I occasionally posted my photos there but at certain point decided to separate the two. I stopped blogging there on April 2012.

Here are some stats for the last year:
  • pageviews: 111.000
  • visits: 46.130
What's more this blog's Alexa rank is increasing pretty fast recently. When I checked it in December it was 8 million. Now it's 2.7 million. So the stats for the last couple of months look good. Also it's great that each month is better than previous one. Keeps me really motivated (mainly to write new tutorials and tips as these seem to be the most popular content here).

Although it's mainly my personal photography blog, the most popular posts are downloadable presets (for Photomatix Pro and Lightroom 4) and HDR tutorial. Also some of my other tutorials (there are 42 of them up do date and all free) are quite popular :)

However, the best thing about this blog is that it shows how my photography skills evolve over time. I'm still far from being happy with them but I see progress. Both composition and my post-processing skills seem to improve.

I have plenty of ideas for next year but you're more than welcome to share yours :)
Saturday, March 23, 2013

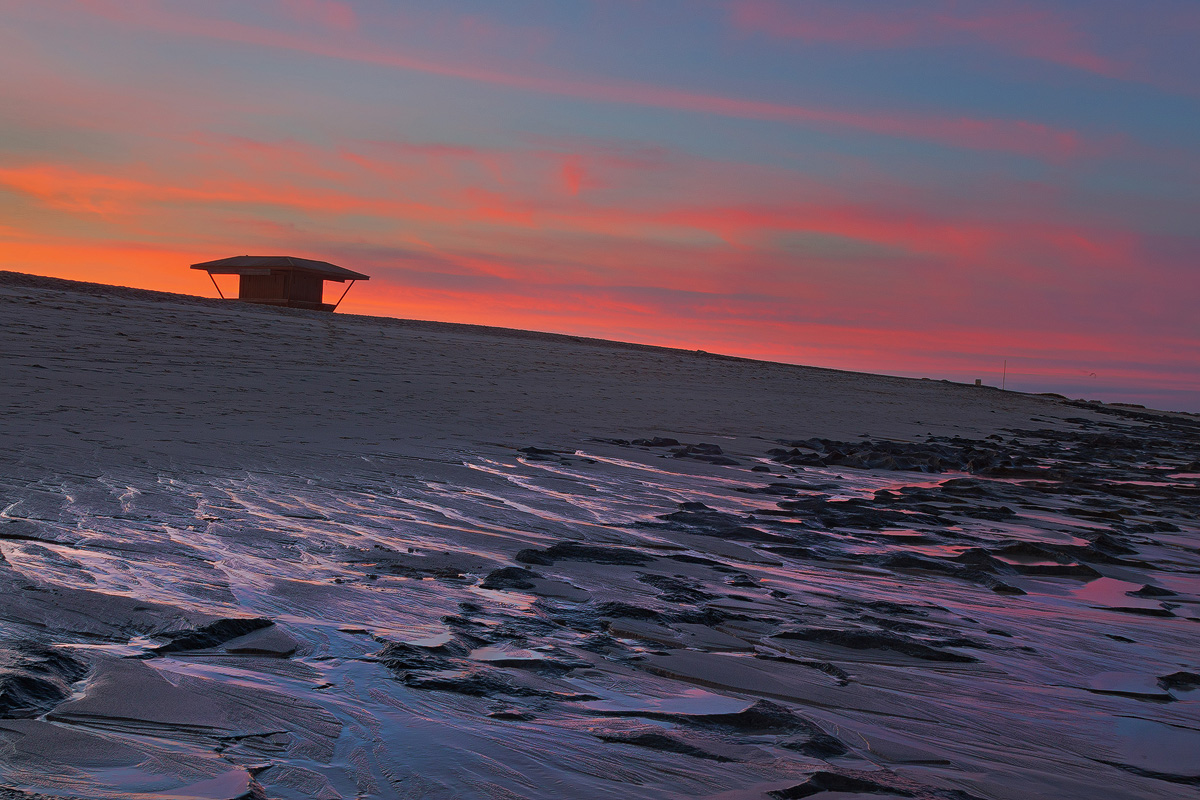
Reflection at sunrise

I love shooting sunrises. Light is warm. It's calm. Nobody is there. Just me, tripod and a camera - and some wonders of nature :)

In this case I wanted to preserve as much mood of the scene I saw as possible. For that reason I tried to keep rocks rather dark (but you can still notice some details in them).

EXIF data:
Camera: Canon 5D MK II
Lens: Canon 24-105 f/4 L IS USM
Focal length: 35 mm
Aperture: f/13.0
Exposure time: 1/6 s ("middle" exposure)
ISO: 100
Number of exposures: 7
E.V. Step: 1
Flash used: no
Tripod: no
Filters: no
Software: Magic Lantern 2.3, Lightroom 4.2, Photoshop CS6
Friday, March 22, 2013

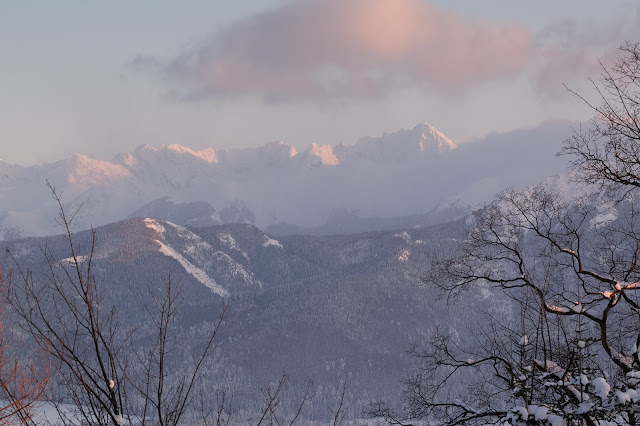
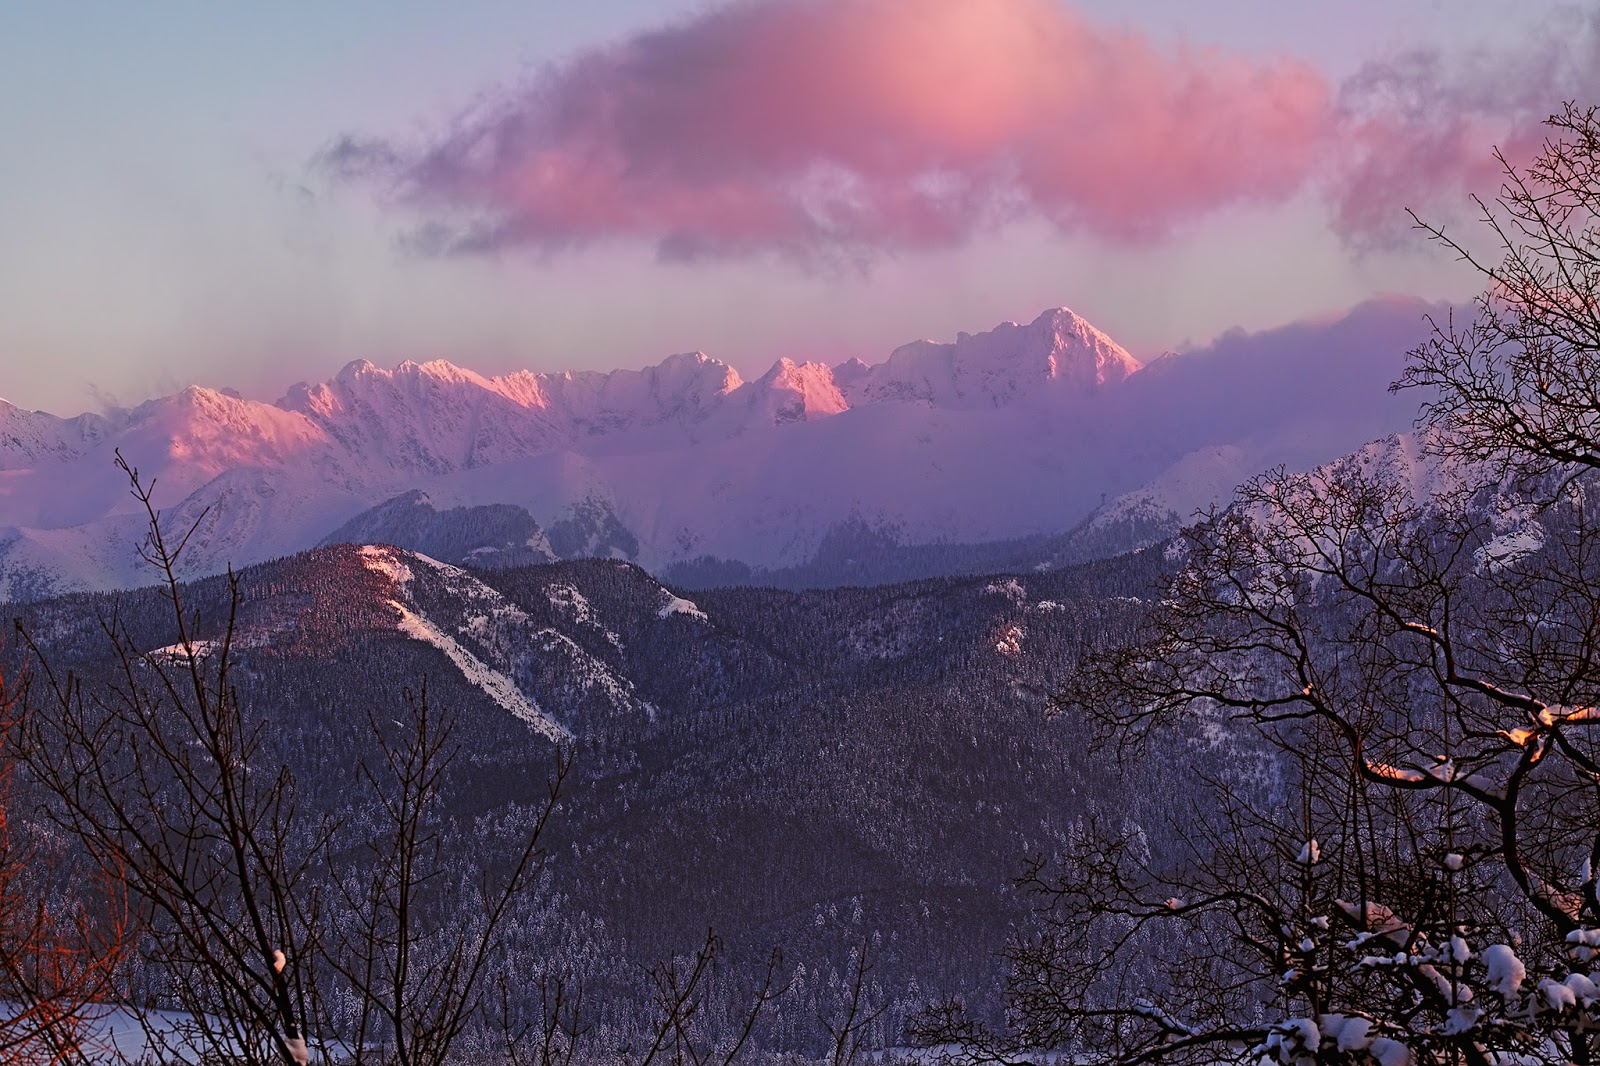
Layers at sunrise

This photo might be boring but I like how the fog together with morning sun created layers in the mountains.

EXIF data:
Camera: Canon 5D MK II
Lens: Canon 24-105 f/4 L IS USM
Focal length: 105 mm
Aperture: f/14.0
Exposure time: 1/1250
ISO: 100
Number of exposures: 1
E.V. Step: n/a
Flash used: no
Tripod: no
Filters: no
Software: Magic Lantern, Lightroom 4.1, Photoshop CS6
Thursday, March 21, 2013

Tutorial: Clarity in Photoshop

before after
Photoshop has plenty of various filters and adjustment layers. However, it misses one simple feature which is present in both Adobe Camera Raw and Lightroom: Clarity slider. Adjusting this slider in Lightroom can add a great boost to the image, make it pop. I use it on many of my images (usually small values though).

So why is this feature missing from Photoshop which is much more powerful than Lightroom in terms of editing photos? In fact, this feature is there in Photoshop. But it's somewhat hidden.

What's more there are a few ways of accessing it. I will describe only one, which is easier and more intuitive.

As you probably noticed, Unsharp Mask, which is commonly used for sharpening, can have very large radius (even 300 or more pixels). However, during sharpening hardly ever anything larger than 4 pixels is used. And even 4 pixel radius is used very rarely. What's more Amount can be set to as low value as 1% even though most commonly values in range 65% - 150% are used during sharpening.

So why are such extremely high and low values possible? In fact, they can be used for increasing clarity in the image! Just set Amount to some low value, eg. 25% or 30% and Radius to some high value, eg. 50 or 80 pixels and Unsharp Mask will increase clarity in your image.

I used exactly this technique to increase clarity of the image posted at the beginning of this post. Before shows the image before applying clarity and After - after doing so. The difference might be subtle but it definitely adds some pop in the trees and snow.

Wednesday, March 20, 2013

Crazy weather

This is one of my favorite photos taken recently. The weather was really crazy - it was cloudy, it was snowing and the sun was shining at the same time. This created some pretty dramatic mood and light.

EXIF data:
Camera: Canon 5D MK II
Lens: Canon 24-105 f/4 L IS USM
Focal length: 24 mm
Aperture: f/8.0
Exposure time: 1/640 s ("middle" exposure)
ISO: 400
Number of exposures: 5
E.V. Step: 1.5 E.V.
Flash used: no
Tripod: no
Filters: circular polarizing filter
Software: Magic Lantern, Photomatix Pro 4.2.5 (Details Enhancer), Lightroom 4.1, Photoshop CS5
Tuesday, March 19, 2013

HDR tutorial updated once again!

My biggest and most popular tutorial (almost 10.000 page views already), namely HDR tutorial, has been updated once again! This time I added a completely new section about Exposure Fusion (which should help you get ultra-realistic results) and made several adjustments, small changes and also fixed a few mistakes.

So if you're interested in Exposure Fusion or haven't read the tutorial yet, head over to it. I would also appreciate any shares of this tutorial as well as comments and suggestions.

Please note that I have the next update of the HDR tutorial scheduled in a few months. I should add a lot of completely new information then. So stay tuned!
Monday, March 18, 2013

Don't take photographaps. Make them

For many people capturing a moment is the end of creative process. They press shutter release button, then download the photos from memory card at home and they're done. Sometimes they add one or two additional steps like applying global contrast or sharpening. But nothing more.

However, this way photograph will never be very good and even if it is (regarding composition for instance) it will be similar to hundreds of hundreds of other photos. It won't stand out of the crowd. It won't be unique. And even worse it won't tell anything about you. It won't show the world the way you see it. It will show the world seen by the camera's sensor.

That's why some photographers say they don't "take" photographs - they "make" them. Making a photograph is a more complex process involving following steps:
  1. Planning a photo - often done long before arriving at a location. You plan what you would like to get, what mood to create, what emotions to convey, what composition to use, etc. For instance I have a few dozens of shots planned which often wait several months to take,
  2. Taking a photo - in this step you actually take the image in such a way as to meet criteria defined by your plan from step 1. You set up your tripod, choose exposure parameters and finally press shutter release. If the situation requires this you may use filters, additional light sources, or various props,
  3. Developing a photo - for me it's where all fun begins. At this step I have just a RAW file which is equivalent of negative in the film era. During development (or post-processing) I try to recreate the scene as I saw it. It doesn't mean it reflects the reality as others saw it.
Of course things are never that easy and for instance with landscape photography plan must be often adjusted after arriving on location - it can turn out that sunrise isn't that beautiful but there might be something else of interest. Also sometimes it takes many days, weeks, months or even years to capture a photo you have in mind. You can for instance wait for perfect light, mood or a certain thing to happen. But when you finally capture the shot, the satisfaction is huge.

Even worse developing a photo also can take a lot of time. For me in most cases it's something between 30 minutes to 2 days but I heard of photographers who can spend even 4 months in this step, perfecting their photos. So I spent relatively short time processing my photos :)

Also note that each of the steps is equally important. If you have a very bad plan, you won't take good photos in step 2. Developing (step 3) won't also help much. Similarly if you have a brilliant plan and great development skills but take very poor photo (for example completely blown-out highlights in sunset photo or a completely blurry photo caused by the wind) it will be close to impossible to save the shot. Finally if your plan was great, and you took the photo perfectly but apply completely wrong post-processing (eg. oversaturated colors) you will just ruin the photo. It means that a photographer needs to have a lot of skills to go through the process without pain. Luckily, although talent is a great addition, most of the skills can be learned.

Many people still claim that photography isn't a "real" art form (compared to painting for instance). Probably it's caused by this take & forget approach I mentioned at the beginning. But when you make a photo, you can for sure call yourself an artist as it requires a lot of skill, a lot of patience and a lot of talent. But basically a lot of passion to what you're doing. In my opinion passion is the main difference between an artist and craftsman.

Don't take me wrong. When I was beginning with photography I only took photographs... sometimes I still do. I try to be perfectionist about my work but very often I fail at one of the steps as I'm still learning.
Sunday, March 17, 2013

Purple sky

Today just a photo without much talk :)

EXIF data:
Camera: Canon 50D
Lens: Canon 24-105 f/4 L IS USM
Focal length: 24 mm
Aperture: f/11
Exposure time: 1/2 s ("middle" exposure)
ISO: 100
Number of exposures: 5
E.V. Step: 1.5 E.V.
Flash used: no
Tripod: yes
Filters: no
Software: Magic Lantern, Photomatix Pro 4.2.4, Lightroom 4.1, Photoshop CS5
Saturday, March 16, 2013

Manually blended sunrise


In the last two days I submitted two tutorials: about Virtual Copies in Lightroom and about some HDR theory so if you're into reading tutorials click on either of these links :) Today there won't be any new tutorial (you have to wait until next week). Instead I'm posting another Fuerteventura sunrise.

However, this one is different. In that very case I didn't use HDR to increase dynamic range. Instead I used technique known as manual blending with help of luminance (or luminosity) masks. I'm not an expert on this technique yet so I won't cover details on it I will just give you the basic idea which is that you load all your files into Photoshop and then using layer masks cover/uncover parts of individual image. This is how the masking looked for 7 exposures I used:

The blending is far from being perfect but also not that bad for beginner :) But blending was just beginning of fun as I then started to apply global & local adjustments to the image (contrast, saturation, colour balance, dodge & burn, vignette):


I'm pretty happy with the output although I'm aware it isn't ideal. What do I think about manual blending? Well, it's a really powerful tool giving you full control over the image. However, it takes so much time to blend a single photo that I won't probably use it very often. Most of the time I'm very happy with my regular tone-mapped or fused images. However, luminosity masks are great tool for applying adjustments to the image to control contrast and saturation and I will use them for that purpose for sure.
Friday, March 15, 2013

Tutorial: Understanding HDR (high dynamic range)

Note: this tutorial was originally published on HDR One, where I'm regular contributor.


When reading various on-line posts and articles related to HDR photography I often see that there is quite a lot of misunderstanding and myths about it. Many users don’t really know what an HDR image really is, what the difference between HDR and exposure fusion is and what really is tone-mapping apart from a buzz word. Sometimes I’m not even sure if they know why they use HDR at all… maybe because it’s just trendy?

Even though without understanding all of these terms it is possible to create appealing and beautiful images, I still think that it’s worth being more aware of what we, HDR photographers, are really into. It’s also better to know for one more reason – this might help you in focusing on things other than that which you are currently focusing on when shooting your HDR photos. Changing points of focus might in turn result in better images. In this article I will give you some basic ideas, but I won’t delve into the super complicated maths behind HDR and tone-mapping.

What really is HDR?

HDR stands for High Dynamic Range. Everyone knows that. But first let’s define dynamic range (forget about high for a moment) – it is a ratio between the lowest and highest luminance in the scene. Or simply a ratio between darkest and brightest points in it. Our eyes have dynamic range of about 10.000:1. It means that they are capable of capturing details in such a range of brightness. However, dynamic range of a real-life scene may be 10 or more times higher (eg. 100.100:1)!

It’s even worse with digital cameras which have even lower dynamic range than our eyes. Typical cameras available on the market today have a dynamic range of 10 or more EVs. For instance according to DxOMark my Canon 5D MK II has a dynamic range of about 11 EVs. What do those 11 EVs really mean? Well, 2 EV is two times brighter than 1 EV, 4 EV is 2 times brighter than 2 EV and 4 times brighter than 1 EV… 11 EV is 2 times brighter than 10 EV, 4 times brighter than 9 EV, 8 times brighter than 8 EV and so on. As you can see we can turn EVs into a power of 2 and write our ratio this way:

2 ^ EV_Value : 1

In the case of my Canon 5D MK II DSLR it will be:

2 ^ 11 = 2048 : 1…

only 2.000 : 1! 5 times worse than my own eyes! And it’s quite a powerful camera (old but still powerful). Now think about that for a while… with typical photography we can capture only a fraction of a real-life scene’s luminosity and detail. Most of it is lost (either in shadows or highlights or both). But things get even worse… due to the design of cameras, data about luminosity isn’t distributed uniformly. Instead the brightest stop corresponds to 50% of all data, next stop to 25% of all data, next 12.5%… It means that 3 brightest stops corresponds to almost 90% of all data! It means that there isn’t much left for the darkest part of the regions meaning that they won’t be as detailed as highlights. So although cameras can capture 10 EVs or more there is very little information about shadows. That’s why we need to pay extra attention to properly capturing details in shadows and that is the reason for the concept of exposing the image to the right (meaning that histogram is aligned to the right). But even when exposing to the right we won’t cover the whole dynamic range of the scene in the majority of cases. That’s when HDR comes into play.

The typical image that can be displayed on a customer’s monitor has 8-bits per channel (given that typical display device can display 3 channels it results in 24-bit depth total). It means that each channel (that is red, green and blue) can have only 255 different values. Note that our monitors cannot even display 16-bit images we often work with HDR in turn is typically associated with images with 32-bits per channel. That means that a lot more data can be stored in each channel (32-bit precision allows for 4,294,967,296 different values to be stored in a single channel!) enough to represent real-life scenes in a correct way. So HDR is more an image representation than post-processing techniques that so many associate it with. HDR doesn’t have anything to do with color over-saturation, halos or other typical problems that so many users and photographers complain about. It has nothing to do with ghosting, alignment, etc. These are all imaging algorithms – nothing more.

HDR is a concept of storing the image so it contains all necessary luminosity data. Both LDR (low-dynamic range – eg. typical photos like JPGs) and HDR images can be thought of as models of reality but the fact is that HDR is more close to it because it can store more luminosity information than typical LDR images are capable of. That is, it can represent reality better. It doesn’t capture more information than there is present in the scene but it can capture more information than our cameras see. It makes the statement: “HDR is unreal” false. It’s like saying that infrared photography is unreal because it shows part of the light spectrum we don’t normally see. Or that macro with scale of 2:1 is unreal because it works more like a microscope than photography… even black & white might be unreal because we see world in colours… HDR is real, it is tone-mapping that might result in unrealistic results (about that in a second).

Now, given that I said that HDR is a model of reality it shouldn’t be surprising that contrary to what some people think HDR isn’t limited to photography. It can be used in movies, 3D graphics and also in video games – everywhere where modelling a reality is necessary.

Displaying HDR image – tone-mapping


As I mentioned, there is a problem with displaying HDR images directly on the monitor because the current generation of display devices aren’t capable of handling images with so many different luminosity values and with such high contrast. There are some projects of 32-bit display devices but most of them are academic and certainly not-widely used at the moment (not to mention their price...).

You can try displaying HDR images in a few applications, for instance in the image above you can see how Photomatix shows HDR images before going into tone-mapping (where all the fun begins really). It basically shows part of the image’s exposure, a lot of details in the shadows and highlights cannot be displayed because the monitor can’t show them.

As we would like to be able to display HDR on a monitor, what we need to do is to map our high-dynamic range image into the luminosity range that our monitor can display, that is to convert our image back to a LDR image in a process known as tone-mapping. This might sound silly at first because what is the purpose of capturing HDR image just to convert it back to LDR? Wouldn’t it be better to just capture LDR image and save yourself a lot of time? Well, yes, it would be better and easier but normal LDR images from a camera will always have less detail or contrast than a tone-mapped LDR image has for reasons given earlier.

The same HDR image as above after tone-mapping is applied might look something like this:
The difference is huge. Also note that if you captured a single LDR exposure you would have to choose whether to expose for the sky or whether to exposure for the rest of the scene. In one case everything but the sky would be very dark in the other one the sky would be blown out. With tone-mapped image we can have both nicely exposed.

As you may have guessed already there are virtually infinite ways of mapping HDR images into the range of the monitor. This is why all software is different and produces different results – each uses different tone-mapping functions. What’s more even the same software might offer different tone-mapping functions, eg. Photomatix offers Details Enhancer (which is great for enhancing detail) and Tone Compressor (which produces some very nice colours). Also the functions can often be customized by a user eg. by dragging a slider in Photomatix Pro.

Tone-mapping might be both a very simple (or even trivial) or a very complex function. In its simplest form it may just scale all the luminosities of the image linearly:

toneMappedLuminosityOfAPixel = (luminosityOfAPixel – minLuminosity) / (maxLuminosity – minLuminosity),

where:
  • toneMappedLuminosityOfAPixel – tone-mapped luminosity of a pixel
  • luminosityOfAPixel – luminosity read from HDR file
  • minLuminosity – minimum luminosity from all the luminosity values in HDR file
  • maxLuminosity – maximum luminosity from all the luminosity values in HDR file
The above operator is known as a linear tone-mapping operator and is one of the simplest I can think of. But it is good to describe some principles of tone-mapping. It contains 3 simple steps:
  1. Converting HDR image to luminance map.
  2. Tone-mapping.
  3. Applying colours to the tone-mapped image.
Now a few words about each of these steps.

Step 1. Converting an HDR image to a luminance map.

I love the saying that “HDR is about light and details not colour” as it is very true. Light in terms of computer graphics is luminosity. Luminosity tells how bright the colour (or light which is basically the same in physics) is. You might think that luminosity is calculated as 0.33 * R + 0.33 * G + 0.33 * B where R, G, B stand for red, green and blue value of a pixel respectively. It’s not that simple I’m afraid because our eyes perceive each of the wavelengths in a slightly different way. Blue seems to be the darkest colour to our eyes, green – the brightest. So researchers came up with a few equations to calculate luminosity, eg:
  • luminosity = 0.299 * R + 0.587 * G + 0.114 * B which is believed to be used by Photoshop, or
  • luminosity = 0.27 * R + 0.67 * G + 0.06 * B, present in Reinhard’s et. al. algorithm’s paper. Probably you’re not familiar with Reinhard’s algorithm but in fact it is one of the first and most popular tone-mapping operators.
Why am I telling you all that? Because the first step of tone-mapping is to calculate luminosities of all the pixels. Luminosities of all pixels of the image can be referred to as a luminance map. As you see from the above, it is basically a grayscale image (no colour at all – that’s why I used this quote at the beginning of this section).

Step 2. Tone-mapping

Step 2. is where all the magic really happens. The input to the tone-mapping step is usually a grayscale image containing luminosity for each of the pixels calculated in step 1.
Given that in the case of HDR image red, green and blue values might be much bigger than 255, luminosity can also be greater than 255. Therefore it needs to be scaled in such a way that luminosities of all pixels fit into the 0 – 255 range. You can think of tone-mapping as loss-less compression method. Also in this step it might be desirable to make sure that enough details in shadows and highlights are preserved (linear tone-mapping operator doesn’t do that).

It means that it is luminosity that is mapped into the luminosity range of the monitor and not colour.
Output from this step is a grayscale image with all luminosities tone-mapped to the displayable range.


Step 3. Applying colours to the tone-mapped image

At this stage luminosity already fits into the range that the monitor can display but the image is still black & white. So in this step we just restore colours. How it is done differs from algorithm to algorithm but in the simplest case, each of the colour channels might be calculated as:

red = redInHdr * (toneMappedLuminance / luminance),

where:
  • redInHdr – is red value read from the HDR file,
  • toneMappedLuminance – is a value from the Step 2.,
  • luminance – is luminance from luminance map from Step 1.
Above I gave an example for red channel but it is similar for green and blue channels as well.
Of course there might be some additional steps, like gamma correction, or the procedure might be slightly different but you get the idea.

As I said before, the algorithm described above is known as a linear tone-mapping. It basically scales all the luminosity values to the available range. It doesn’t take any image characteristics into account and most of the time it results in a very dark image (unless gamma correction is used). Also it uses the same function on all pixels of the image. For that last reason it is known as a global tone-mapping operator. There are also local operators and here is short summary of both groups:
  1. global operators – each pixel is tone-mapped in the same way based on some global image characteristics (like eg. luminosity). As you may have guessed this makes these kind of methods really fast (that’s one of the reasons they are used in video games more commonly than local operators) but there might be some loss of detail. The greater the dynamic range of the source image the greater loss of detail is possible.
  2. local operators – are working on the local features of the image. It means that tone-mapping might work differently for each pixel of the image depending on characteristics of its surrounding. Local operators are commonly used in HDR software because they produce more appealing images with details and micro-contrast being well enhanced. However, local tone-mapping operators have a few drawbacks. First of all they can amplify noise in the image as software cannot always determine if something is just noise or very small detail so it treats it as detail. When small details are enhanced, so is the noise. Tone-mapping is no exception here. Many sharpening tools must deal with the same issue. Another issue with local tone-mapping operators is they can produce halo artifacts around the edges.
But tone-mapping is rarely such an easy algorithm as linear operator – it is often a complex process which can reproduce details very well. It contains a lot of complicated steps. What’s more, purposes for tone-mapping might be different – from producing realistic results to reproducing details very well (eg. in highlights and shadows) or to achieving some artistic results. That’s why there is so many different HDR software out there.


Still not convinced that HDR isn’t about colour? Ok, here is another example. Some operators, including for instance Durand and Dorsay tone-mapping operator (another basic and well-known operator), works on details. First they convert an image to a luminance map. It is then decomposed into base layer and detail layer. Base layer is one on which all the tone-mapping happens. Once processing it is finished, a detail map is added to it. Finally the result is multiplied by the color layer. It means that again color is applied to an already tone-mapped image at the last step.

And Exposure Fusion? What is that?

Note: you can read more details about exposure fusion in my other tutorial.

At the beginning of this article I also mentioned something like Exposure Fusion. What’s that?
Exposure fusion is a technique of blending several input images – a technique well known to many photographers because they have been manually blending several exposures for many years. Exposure fusion doesn’t have much to do with HDR as it doesn’t use wide dynamic range images at all. It’s all about taking pixels from the source photos and outputting them to the final image. The decision whether to take a pixel from a photo or not is based on different characteristics ranging from algorithm to algorithm. You might consider well-exposedness, colour saturation, noise-level etc.

When someone does something often called manual HDR blending, he in fact uses processes very similar to exposure fusion. Why? Because exposure fusion is a process where source images are taken and blended directly into a LDR image that is without steps of generating HDR and tone-mapping. Similarly here, the user decided whether to take a pixel (or group of them) from one photo or from another one.

Summary

I hope that these few paragraphs increased your knowledge of HDR a little bit. You should now be convinced that HDR isn’t at all about a surreal look, over-saturated colours or artifacts like halos or ghosting. It’s about representing reality in a better and more appropriate way than traditional photography.

But also keep in mind that in order to make your resulting images realistic you have to pay special attention to tone-mapping as this is where things can go wrong (meaning – unrealistic). Each of the HDR software offers surreal or grungy presets. If you’re into a realistic look – stay away from them. In Photomatix I usually use the Default preset with just a few adjustments. Is it boring? Might be – but reality is often boring as well. I believe we shouldn’t change it entirely but we should capture it as it is. We can then enhance it a little bit in post-processing.
Thursday, March 14, 2013

Tip: Lightroom's Virtual Copy

Today daily photo was capture in Tatra mountains during evening golden hour. I used 3 exposures only and tone-mapped them in Photomatix Pro. Fine-tuning was done in Lightroom and Photoshop CS using luminosity masks technique.
Amongst many, one of the very useful features of Lightroom is so called Virtual Copy. A simple feature that will make your life easier if you experiment with different settings on your images.

What is a Virtual Copy? As the name implies it's a virtual copy :) "Regular" copies occupy the same amount of space on disk as the original image (and you can create them by copying and pasting). For large RAW or TIFF files it can be from 20 even to few hundred megabytes. Virtual Copy instead occupies just a few bytes. How? It's easy - it doesn't contain any image data at all, only metadata (like eg. Clarity, White Balance or Exposure settings). Then when developing a Virtual Copy in Lightroom it uses image data from the original image but applies metadata from your Virtual Copy.

To create a Virtual Copy you need to:
  1. Right-click on your image in Filmstrip .
  2. Click on the Create Virtual Copy item in the contextual menu.
To create Virtual Copy right-click on your image and select Create Virtual Copy menu item.
    If you have both Virtual Copy and the original image developed using the same settings it's quite difficult to tell which is which in Lightroom. Luckily there is one subtle difference - Virtual Copy has "page" symbol in the left bottom corner - take a look at the screenshot below:

    Virtual Copies are useful for many reasons but here are the two most important in my opinion:
    1. You can easily develop the same photo with different settings (eg. in colour and in black & white). You could of course duplicate file on disk (by copying and pasting) but this would be very memory inefficient. It makes experimenting easier and more efficient.
    2. It's easier to derive fake bracketed photos from a single exposure (you can read more about this technique here) what is useful if you want to create fake HDR image from a single file. Let's say you need to create 3 images out of your single RAW. Using this feature you can simply create 3 Virtual Copies, set different exposure setting to each of them (eg. -2, 0, +2) and export them to Photomatix Pro.
    Wednesday, March 13, 2013

    Before/after comparison: overedited photo

    before after

    Time for another before/after comparison. Today straight-out-of-the-camera RAW file vs. finished edited image. Comparing the too you might get the impression that I "over edited" the original shot. However, bear in mind that SOOC file was developed with default ACR settings and I even didn't correct white balance for it (upon closer inspection you will notice unpleasant blue cast especially in the shadows in the lower part of the image). This means that the image is flatter, less contrasty and less saturated than the scene really was.
    Finished image in turn looks more like the scene I remember. Of course it doesn't mean the scene looked exactly that way. No. This is just the way I saw it. When developing images, it is essential to try to recreate the scene, image you saw. Not to try to portray reality in the way everyone perceives it. This way your images will be unique.

    EXIF data:
    Camera: Canon 5D MK II
    Lens: Canon 24-105 f/4 L IS USM
    Focal length: 100 mm
    Aperture: f/9.0
    Exposure time: 1/250
    ISO: 500
    Number of exposures: 1
    E.V. Step: n/a
    Flash used: no
    Tripod used: no
    Filters used: circular polarizing filter
    Software: Magic Lantern 2.3, Lightroom 4.2, Photoshop CS5
    Tuesday, March 12, 2013

    Shepherd huts

    There are plenty of shepherd huts in the valleys in Tatra mountains. Here are just a few from Chocholowska valley (BTW I took this photo after something like 14 km of trekking :) ). The weather was far from ideal but I still like the composition with this mountain in the background. However, I hope to visit the very same place in spring/summer/autumn when there won't be snow but instead there will be vividly green grass. With blue sky this scene must look absolutely amazing.

    EXIF data:
    Camera: Canon 5D MK II
    Lens: Canon 24-105 f/4 L IS USM
    Focal length: 32 mm
    Aperture: f/7.1
    Exposure time: 1/500 s ("middle" exposure)
    ISO: 800
    Number of exposures: 3
    E.V. Step: 2 EV
    Flash used: no
    Tripod used: no
    Filters used: circular polarizing filter
    Software: Magic Lantern 2.3, Photomatix Pro 4.2.5 (Details Enhancer), Lightroom 4.2, Photoshop CS6
    Monday, March 11, 2013

    Long exposure HDR photo from Canary Islands

    Today I would like to share with you a photo I took a few minutes before sunrise on Fuerteventura island. The longest exposure was 247 seconds, taking whole sequence of 5 photos took more than 7 minutes! For that reason I had only one chance to take this photo. A few minutes earlier it was too dark, a few minutes later it was too light.

    I'm pretty happy with the results although I'm thinking of reprocessing this image.

    EXIF data:
    Camera: Canon 50D
    Lens: Canon 10-22 f/3.5-4.5 USM
    Focal length: 10 mm
    Aperture: f/11.0
    Exposure time: 60 s ("middle" exposure)
    ISO: 100
    Number of exposures: 5
    E.V. Step: 1 EV
    Flash used: no
    Tripod used: yes
    Filters used: ND8
    Software: Magic Lantern 2.3, Photomatix Pro 4.2.5 (Details Enhancer), Lightroom 4.2, Photoshop CS6
    Sunday, March 10, 2013

    On the way to Morskie Oko


    I took this photo on the way to Morskie Oko lake (Eye of the Sea lake) which is the largest and fourth deepest lake in Tatra Mountains.

    EXIF data:
    Camera: Canon 5D MK II
    Lens: Canon 24-105 f/4 L IS USM
    Focal length: 24 mm
    Aperture: f/9.0
    Exposure time: 1/640 s ("middle" exposure)
    ISO: 800
    Number of exposures: 5
    E.V. Step: 1 EV
    Flash used: no
    Tripod used: no
    Filters used: circular polarizing filter
    Software: Magic Lantern 2.3, Photomatix Pro 4.2.5 (Details Enhancer), Lightroom 4.2, Photoshop CS6
    Saturday, March 9, 2013

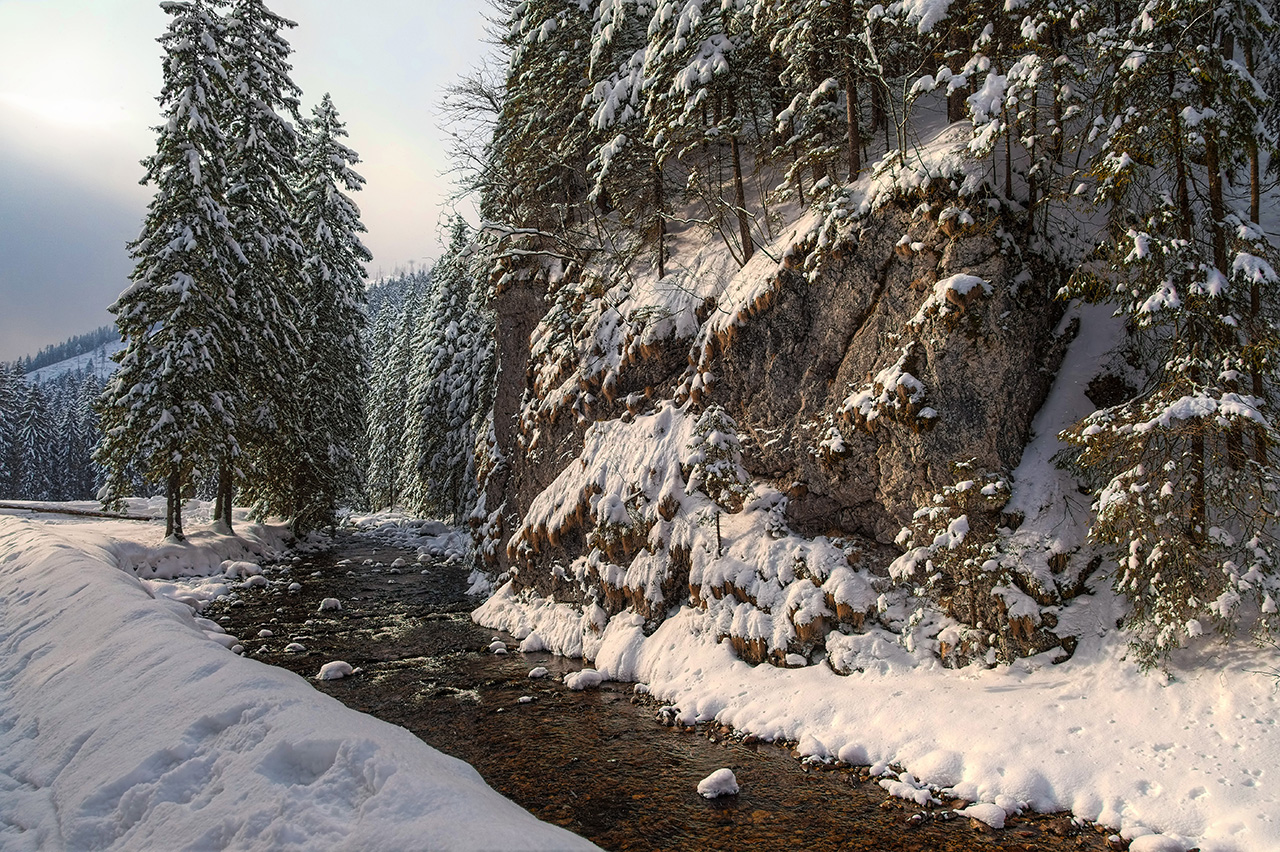
    Mountain stream

    I really liked the light in this mountain scene. Despite it was middle of the day, the light was pretty dramatic. Also bright snow contrasts nicely with dark water of the stream. I'm also quite happy with the composition. Both the road and the stream lead the eye through the scene to the forest in the background.

    EXIF data:
    Camera: Canon 5D MK II
    Lens: Canon 24-105 f/4 L IS USM
    Focal length: 24 mm
    Aperture: f/7.1
    Exposure time: 1/640 s ("middle" exposure)
    ISO: 800
    Number of exposures: 5
    E.V. Step: 1 EV
    Flash used: no
    Tripod used: no
    Filters used: no
    Software: Magic Lantern 2.3, Photomatix Pro 4.2.5 (Details Enhancer), Lightroom 4.2, Photoshop CS6
    Friday, March 8, 2013

    Another night HDR shot

    Today one more night photo. I used Exposure Fusion for that (so technically speaking it was never a HDR photo). I didn't want this one to be ultra bright because I like the mood created by lights against the darkness.

    EXIF data:
    Camera: Canon 5D MK II
    Lens: Canon 24 f/1.4 L USM II
    Focal length: 24 mm
    Aperture: f/5.0
    Exposure time: 10 s ("middle" exposure)
    ISO: 500
    Number of exposures: 5
    E.V. Step: 1 EV
    Flash used: no
    Tripod used: yes
    Filters used: no
    Software: Magic Lantern 2.3, Photomatix Pro 4.2.5 (Exposure Fusion), Lightroom 4.2, Photoshop CS6
    Thursday, March 7, 2013

    There's peak... somewhere

    Recently I shoot more and more black & white photos. I really like how one can control the mood when shooting them.

    EXIF data:
    Camera: Canon 5D MK II
    Lens: Canon 24-105 f/4 L IS USM
    Focal length: 105 mm
    Aperture: f/9.0
    Exposure time: 1/320 s
    ISO: 800
    Number of exposures: 1
    E.V. Step: n/a
    Flash used: no
    Tripod used: no
    Filters used: circular polarizing filter
    Software: Magic Lantern 2.3, Lightroom 4.2, Photoshop CS6
    Wednesday, March 6, 2013

    I lied to you

    I recently wrote that light it the most important thing in landscape photography. I must admit - I didn't tell you whole story. Sometimes there are other factors which are more important: texture, detail or as in the photo above - contrast. Of course contrast is created by light & shadows (so to some extent I was telling the truth) but in this case the colours aren't that important. When I view above image in full size on my 24-inch monitor the first thing I'm paying attention to is contrast and how it helps in emphasizing rocks structure.

    EXIF data:
    Camera: Canon 5D MK II
    Lens: Canon 24-105 f/4 L IS USM
    Focal length: 24 mm
    Aperture: f/9.0
    Exposure time: 1/6400 s
    ISO: 500
    Number of exposures: 5
    E.V. Step: 1 EV
    Flash used: no
    Tripod used: no
    Filters used: circular polarizing filter
    Software: Magic Lantern 2.3, Photomatix Pro 4.2.5 (Details Enhancer), Lightroom 4.2, Photoshop CS6
    Tuesday, March 5, 2013

    Lonely hut

    Today another photo of a hut.

    EXIF data:
    Camera: Canon 5D MK II
    Lens: Canon 24-105 f/4 L IS USM
    Focal length: 24 mm
    Aperture: f/7.1
    Exposure time: 1/1000 s ("middle" exposure)
    ISO: 800
    Number of exposures: 3
    E.V. Step: 2 EV
    Flash used: no
    Tripod used: no
    Filters used: circular polarizing filter
    Software: Magic Lantern 2.3, Photomatix Pro 4.2.5 (Details Enhancer), Lightroom 4.2, Photoshop CS6
    Monday, March 4, 2013

    Tutorial: How to take photos of the stars - part 3. Post-processing

    In this part of the series I will show you how to process an astrophoto to get such a result as above.
    It took me very long time but finally here is part 3 of my tutorial about shooting stars. There might be 1 more in the future but we shall see.
    If you haven't already read:
    1. Part 1. Which discusses equipment and shooting regular starry sky.
    2. Part 2. Which focuses on taking photos of star trails.
    3. My other tutorials.
    Straight out of the camera (SOOC) image will rarely look good.  Astrophotography is no different. Professional and advanced astrophotographers employ a number of techniques like dark frames, flat frames, light frames and bias frames for best and noise-free image quality. But as they shoot distant galaxies they use much longer exposures and basically deal with a lot more issues. I won't go into that. Why? Because I'm landscape photographer, occasionally shooting stars to show their beauty as the background for our earthly landscapes. I'm not shooting stars just to show them but to use them to create certain mood or atmosphere.

    In previous parts I discussed techniques I use when shooting stars in the field. However, when I'm back home I usually spent quite a lot of time post-processing them. In this tutorial I will focus on this aspect. However, as describing it with words is rather difficult I decided to record a video tutorial which shows some of adjustments I make on an example photo:

    Sunday, March 3, 2013

    Fire mountains

    Two days ago I mentioned that photography is all about light. Here is another example. I love this warm light on the peaks against dark blue (or grey - I'm not that good at naming colours :) ) in the lower parts of the mountains.

    In this case I used a focal length of 300 mm because I wanted to focus on the peaks. It was quite late so there was little to no light in the valley. If I used a wide angle lens I would therefore end up with a heavily underexposed photo.

    EXIF data:
    Camera: Canon 5D MK II
    Lens: Canon 70-300 f/4.0-5.6 L IS USM
    Focal length: 300 mm
    Aperture: f/9.0
    Exposure time: 1/500
    ISO: 500
    Number of exposures: 1
    E.V. Step: n/a
    Flash used: no
    Tripod used: no
    Filters used: no
    Software: Magic Lantern 2.3, Lightroom 4.2, Photoshop CS6
    Saturday, March 2, 2013

    Mountain hostel

    I posted B&W version of this photo recently and here is color version.

    EXIF data:
    Camera: Canon 5D MK II
    Lens: Canon 24-105 f/4 L IS USM
    Focal length: 32 mm
    Aperture: f/7.1
    Exposure time: 1/500 s
    ISO: 800
    Number of exposures: 3
    E.V. Step: 2 EV
    Flash used: no
    Tripod used: no
    Filters used: circular polarizing filter
    Software: Magic Lantern 2.3, Photomatix Pro 4.2.5 (Details Enhancer), Lightroom 4.2, Photoshop CS6
    Friday, March 1, 2013

    Green moss

    Today a bit less spectacular photo but I still like it. This green moss looks amazingly vividly against the white of the snow. I used circular polarizing filter to increase saturation of greens in this photo.

    EXIF data:
    Camera: Canon 5D MK II
    Lens: Canon 24-105 f/4 L IS USM
    Focal length: 65 mm
    Aperture: f/8.0
    Exposure time: 1/80 s ("middle" exposure)
    ISO: 400
    Number of exposures: 3
    E.V. Step: 2 E.V.
    Flash used: no
    Tripod used: no
    Filters used: circular polarizing filter
    Software: Magic Lantern 2.3, Photomatix Pro 4.2.5 (Details Enhancer), Lightroom 4.2, Photoshop CS6
     
    © Copyright 2011 Photoshop and Photography All Rights Reserved.
    Free Templates by Cool Blogger Tutorials- Powered by Blogger.com.